Launcher是android手机启动后第一个看到的界面,即手机系统的桌面,下面我们就以android原生的Launcher3为例看看界面布局和显示的数据怎么获取的来简要分析下android手机桌面
Launcher中第一显示的Activity为Launcher.java,下面我们主要看看这个布局文件launcher.xml
//packages/apps/Launcher3/res/layout-land/launcher.xml <!-- Full screen view projects under the status bar and contains the background --> <com.android.launcher3.LauncherRootView xmlns:android="http://schemas.android.com/apk/res/android" xmlns:launcher="http://schemas.android.com/apk/res-auto" android:id="@+id/launcher" android:layout_width="match_parent" android:layout_height="match_parent" android:fitsSystemWindows="true"> <com.android.launcher3.dragndrop.DragLayer android:id="@+id/drag_layer" android:clipChildren="false" android:clipToPadding="false" android:background="@drawable/workspace_bg" android:importantForAccessibility="no" android:layout_width="match_parent" android:layout_height="match_parent"> <!-- The workspace contains 5 screens of cells --> <!-- DO NOT CHANGE THE ID --> <com.android.launcher3.Workspace android:id="@+id/workspace" android:layout_width="match_parent" android:layout_height="match_parent" android:layout_gravity="center" launcher:pageIndicator="@id/page_indicator" /> <!-- DO NOT CHANGE THE ID --> <include layout="@layout/hotseat" android:id="@+id/hotseat" android:layout_width="match_parent" android:layout_height="match_parent" android:layout_gravity="right" launcher:layout_ignoreInsets="true" /> <include android:id="@+id/drop_target_bar" layout="@layout/drop_target_bar_vert" /> <include layout="@layout/overview_panel" android:id="@+id/overview_panel" android:visibility="gone" /> <com.android.launcher3.pageindicators.PageIndicatorCaretLandscape android:id="@+id/page_indicator" android:layout_width="@dimen/dynamic_grid_page_indicator_height" android:layout_height="@dimen/dynamic_grid_page_indicator_height" android:layout_gravity="bottom|left"/> <!-- A place holder view instead of the QSB in transposed layout --> <View android:layout_width="0dp" android:layout_height="10dp" android:id="@+id/workspace_blocked_row" /> <include layout="@layout/widgets_view" android:id="@+id/widgets_view" android:layout_width="match_parent" android:layout_height="match_parent" android:visibility="invisible" /> <include layout="@layout/all_apps" android:id="@+id/apps_view" android:layout_width="match_parent" android:layout_height="match_parent" android:visibility="invisible" /> </com.android.launcher3.dragndrop.DragLayer> </com.android.launcher3.LauncherRootView> 接着看下对应的UI显示,也可以对着上面的布局看看
这个界面显示的主要为Shortcut和Widget,其中最下面一行的几个Shortcut比较特殊,都设置了setIsHotseat属性,在具体显示的时候会根据来判断是不是显示在最下一行,另外显示的个数也在dw_phone_hotseat.xml有默认配置的,当用户还想再这个里面放入其它apk快捷方式时,会根据除去已显示的图标后剩余空间来决定是单独显示图标,还是和其它apk图标放在一个文件夹里显示。
所有的这些数据都会放入到数据库launcher.db中保存。Hotseat为FrameLayout的子类,通过Launcher里的getDeviceProfile获取DeviceProfile对象,里面包含特定设备的一些配置文件
在InvariantDeviceProfile.java中通过getPredefinedDeviceProfiles来获取所有的device_profiles
//packages/apps/Launcher3/src/com/android/launcher3/InvariantDeviceProfile.java ArrayList<InvariantDeviceProfile> getPredefinedDeviceProfiles(Context context) { ArrayList<InvariantDeviceProfile> profiles = new ArrayList<>(); try (XmlResourceParser parser = context.getResources().getXml(R.xml.device_profiles)) { final int depth = parser.getDepth(); int type; while (((type = parser.next()) != XmlPullParser.END_TAG || parser.getDepth() > depth) && type != XmlPullParser.END_DOCUMENT) { if ((type == XmlPullParser.START_TAG) && "profile".equals(parser.getName())) { TypedArray a = context.obtainStyledAttributes( Xml.asAttributeSet(parser), R.styleable.InvariantDeviceProfile); int numRows = a.getInt(R.styleable.InvariantDeviceProfile_numRows, 0); int numColumns = a.getInt(R.styleable.InvariantDeviceProfile_numColumns, 0); float iconSize = a.getFloat(R.styleable.InvariantDeviceProfile_iconSize, 0); profiles.add(new InvariantDeviceProfile( a.getString(R.styleable.InvariantDeviceProfile_name), a.getFloat(R.styleable.InvariantDeviceProfile_minWidthDps, 0), a.getFloat(R.styleable.InvariantDeviceProfile_minHeightDps, 0), numRows, numColumns, a.getInt(R.styleable.InvariantDeviceProfile_numFolderRows, numRows), a.getInt(R.styleable.InvariantDeviceProfile_numFolderColumns, numColumns), a.getInt(R.styleable.InvariantDeviceProfile_minAllAppsPredictionColumns, numColumns), iconSize, a.getFloat(R.styleable.InvariantDeviceProfile_iconTextSize, 0), a.getInt(R.styleable.InvariantDeviceProfile_numHotseatIcons, numColumns), a.getFloat(R.styleable.InvariantDeviceProfile_hotseatIconSize, iconSize), a.getResourceId(R.styleable.InvariantDeviceProfile_defaultLayoutId, 0))); a.recycle(); } } } catch (IOException|XmlPullParserException e) { throw new RuntimeException(e); } return profiles; } 解析device_profiles.xml读取获得ArrayList<InvariantDeviceProfile> profiles,最后根据手机屏幕宽高调用findClosestDeviceProfiles和invDistWeightedInterpolate获取合适的InvariantDeviceProfile,InvariantDeviceProfile里包含了每行每列允许显示的个数等配置packages/apps/Launcher3/src/com/android/launcher3/InvariantDeviceProfile.java
ArrayList<InvariantDeviceProfile> findClosestDeviceProfiles( final float width, final float height, ArrayList<InvariantDeviceProfile> points) { // Sort the profiles by their closeness to the dimensions ArrayList<InvariantDeviceProfile> pointsByNearness = points; Collections.sort(pointsByNearness, new Comparator<InvariantDeviceProfile>() { public int compare(InvariantDeviceProfile a, InvariantDeviceProfile b) { return Float.compare(dist(width, height, a.minWidthDps, a.minHeightDps), dist(width, height, b.minWidthDps, b.minHeightDps)); } }); return pointsByNearness; } 下面简单贴了个device_profiles.xml的配置/packages/apps/Launcher3/res/xml/device_profiles.xml
<profiles xmlns:launcher="http://schemas.android.com/apk/res-auto/com.android.launcher3" > <profile launcher:name="Nexus 4" launcher:minWidthDps="359" launcher:minHeightDps="567" launcher:numRows="4" launcher:numColumns="4" launcher:numFolderRows="4" launcher:numFolderColumns="4" launcher:minAllAppsPredictionColumns="4" launcher:iconSize="60" launcher:iconTextSize="13.0" launcher:numHotseatIcons="5" launcher:hotseatIconSize="56" launcher:defaultLayoutId="@xml/default_workspace_4x4" /> ... </profiles> default_workspace_4x4.xmlpackages/apps/Launcher3/res/xml/default_workspace_4x4.xml
<favorites xmlns:launcher="http://schemas.android.com/apk/res-auto/com.android.launcher3"> <!-- Hotseat --> <include launcher:workspace="@xml/dw_phone_hotseat" /> <!-- Bottom row --> <resolve launcher:screen="0" launcher:x="0" launcher:y="-1" > <favorite launcher:uri="#Intent;action=android.intent.action.MAIN;category=android.intent.category.APP_EMAIL;end" /> <favorite launcher:uri="mailto:" /> </resolve> <resolve launcher:screen="0" launcher:x="1" launcher:y="-1" > <favorite launcher:uri="#Intent;action=android.intent.action.MAIN;category=android.intent.category.APP_GALLERY;end" /> <favorite launcher:uri="#Intent;type=images/*;end" /> </resolve> <resolve launcher:screen="0" launcher:x="3" launcher:y="-1" > <favorite launcher:uri="#Intent;action=android.intent.action.MAIN;category=android.intent.category.APP_MARKET;end" /> <favorite launcher:uri="market://details?id=com.android.launcher" /> </resolve> </favorites> dw_phone_hotseat.xmlpackages/apps/Launcher3/res/xml/dw_phone_hotseat.xml
<?xml version="1.0" encoding="utf-8"?> <favorites xmlns:launcher="http://schemas.android.com/apk/res-auto/com.android.launcher3"> <!-- Hotseat (We use the screen as the position of the item in the hotseat) --> <!-- Dialer, Messaging, [All Apps], Browser, Camera --> <resolve launcher:container="-101" launcher:screen="0" launcher:x="0" launcher:y="0" > <favorite launcher:uri="#Intent;action=android.intent.action.DIAL;end" /> <favorite launcher:uri="tel:123" /> <favorite launcher:uri="#Intent;action=android.intent.action.CALL_BUTTON;end" /> </resolve> <resolve launcher:container="-101" launcher:screen="1" launcher:x="1" launcher:y="0" > <favorite launcher:uri="#Intent;action=android.intent.action.MAIN;category=android.intent.category.APP_MESSAGING;end" /> <favorite launcher:uri="sms:" /> <favorite launcher:uri="smsto:" /> <favorite launcher:uri="mms:" /> <favorite launcher:uri="mmsto:" /> </resolve> <!-- All Apps --> <resolve launcher:container="-101" launcher:screen="3" launcher:x="3" launcher:y="0" > <favorite launcher:uri="#Intent;action=android.intent.action.MAIN;category=android.intent.category.APP_BROWSER;end" /> <favorite launcher:uri="http://www.example.com/" /> </resolve> <resolve launcher:container="-101" launcher:screen="4" launcher:x="4" launcher:y="0" > <favorite launcher:uri="#Intent;action=android.media.action.STILL_IMAGE_CAMERA;end" /> <favorite launcher:uri="#Intent;action=android.intent.action.CAMERA_BUTTON;end" /> </resolve> </favorites> 其中Favorites和Workspaces都会保存在launcher.db里的favorites和workspaceScreens表里,上面只是默认显示的,当用户手动把某个应用放入这块时,会根据当前的剩余空间,来决定是单独显示一个icon还是和另一个图标一起显示在一个文件夹里,通过default_workspace_4x4.xml可知道当前主屏幕上默认配置显示那些apk,当然所有这样配置都会保存在数据库中,这样当用户拖拽某个apk后,都会写入到相应数据库中的,下面只是贴了下把默认配置写入数据库的逻辑//packages/apps/Launcher3/src/com/android/launcher3/LauncherProvider.java
synchronized private void loadDefaultFavoritesIfNecessary() { SharedPreferences sp = Utilities.getPrefs(getContext()); if (sp.getBoolean(EMPTY_DATABASE_CREATED, false)) { Log.d(TAG, "loading default workspace"); AppWidgetHost widgetHost = new AppWidgetHost(getContext(), Launcher.APPWIDGET_HOST_ID); AutoInstallsLayout loader = createWorkspaceLoaderFromAppRestriction(widgetHost); if (loader == null) { loader = AutoInstallsLayout.get(getContext(),widgetHost, mOpenHelper); } if (loader == null) { final Partner partner = Partner.get(getContext().getPackageManager()); if (partner != null && partner.hasDefaultLayout()) { final Resources partnerRes = partner.getResources(); int workspaceResId = partnerRes.getIdentifier(Partner.RES_DEFAULT_LAYOUT, "xml", partner.getPackageName()); if (workspaceResId != 0) { loader = new DefaultLayoutParser(getContext(), widgetHost, mOpenHelper, partnerRes, workspaceResId); } } } final boolean usingExternallyProvidedLayout = loader != null; if (loader == null) { loader = getDefaultLayoutParser(widgetHost); } // There might be some partially restored DB items, due to buggy restore logic in // previous versions of launcher. createEmptyDB(); // Populate favorites table with initial favorites if ((mOpenHelper.loadFavorites(mOpenHelper.getWritableDatabase(), loader) <= 0) && usingExternallyProvidedLayout) { // Unable to load external layout. Cleanup and load the internal layout. createEmptyDB(); mOpenHelper.loadFavorites(mOpenHelper.getWritableDatabase(), getDefaultLayoutParser(widgetHost)); } clearFlagEmptyDbCreated(); } } 说了这么多,先来看看主界面的显示图,再来看看所有桌面apk的信息是怎么获取,调用getActivityList获取的,其中第一个参数packageName传入的是null,查询所有配置了intent Action为ACTION_MAIN,Category为CATEGORY_LAUNCHER的应用集合列表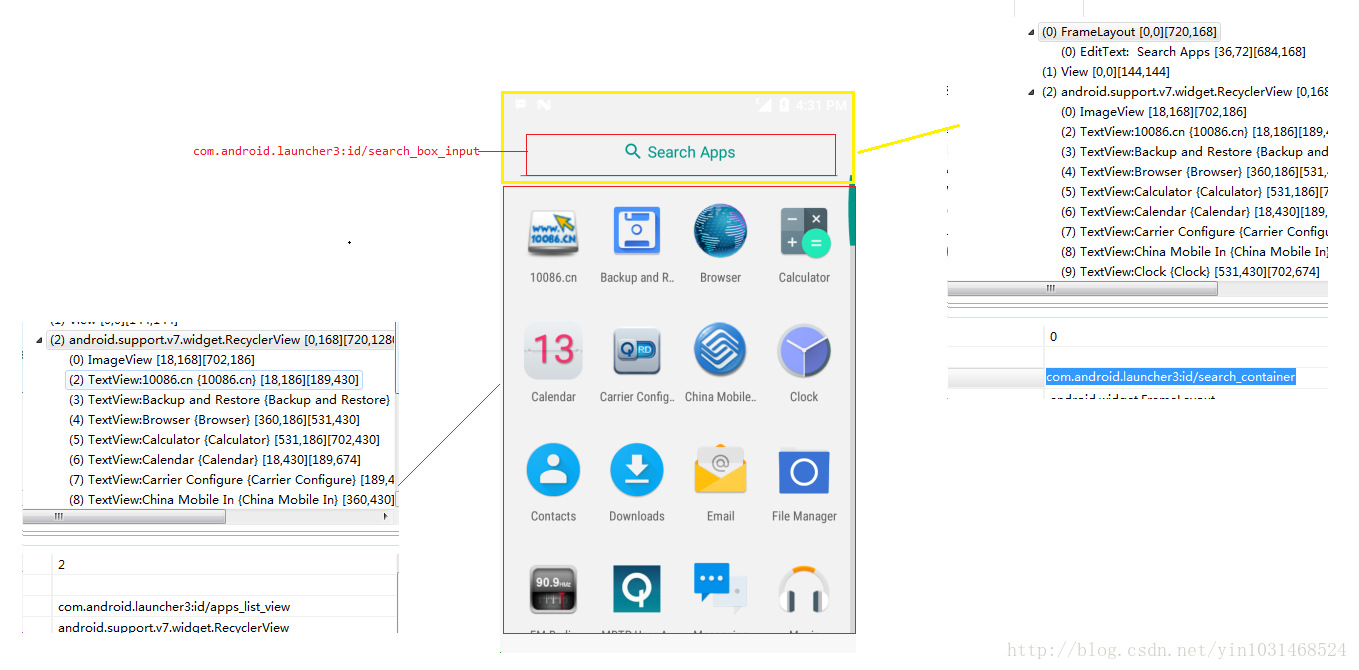
//packages/apps/Launcher3/src/com/android/launcher3/compat/LauncherAppsCompatV16.java
public List<LauncherActivityInfoCompat> getActivityList(String packageName, UserHandleCompat user) { final Intent mainIntent = new Intent(Intent.ACTION_MAIN, null); mainIntent.addCategory(Intent.CATEGORY_LAUNCHER); mainIntent.setPackage(packageName); List<ResolveInfo> infos = mPm.queryIntentActivities(mainIntent, 0); List<LauncherActivityInfoCompat> list = new ArrayList<LauncherActivityInfoCompat>(infos.size()); for (ResolveInfo info : infos) { list.add(new LauncherActivityInfoCompatV16(mContext, info)); } return list; } 进入主界面后就是一个AllAppsContainerView,继承FrameLayout,在构造方法中设置的setAdapter为AllAppsGridAdapter AllAppsGridAdapter extends RecyclerView.Adapter,并且在这里调用了mAppsRecyclerView.setApps(mApps)传入了所有的apps 信息//packages/apps/Launcher3/src/com/android/launcher3/allapps/AllAppsContainerView.java
@Override protected void onFinishInflate() { super.onFinishInflate(); ... // Load the all apps recycler view mAppsRecyclerView = (AllAppsRecyclerView) findViewById(R.id.apps_list_view); mAppsRecyclerView.setApps(mApps); mAppsRecyclerView.setLayoutManager(mLayoutManager); mAppsRecyclerView.setAdapter(mAdapter); mAppsRecyclerView.setHasFixedSize(true); mAppsRecyclerView.addOnScrollListener(mElevationController); mAppsRecyclerView.setElevationController(mElevationController); ... } 在AllAppsGridAdapter调用onCreateViewHolder和onBindViewHolder来显示view//packages/apps/Launcher3/src/com/android/launcher3/allapps/AllAppsGridAdapter.java
public ViewHolder onCreateViewHolder(ViewGroup parent, int viewType) { switch (viewType) { case VIEW_TYPE_SECTION_BREAK: return new ViewHolder(new View(parent.getContext())); case VIEW_TYPE_ICON: /* falls through */ case VIEW_TYPE_PREDICTION_ICON: { BubbleTextView icon = (BubbleTextView) mLayoutInflater.inflate( R.layout.all_apps_icon, parent, false); icon.setOnClickListener(mIconClickListener); //设置每个控件的点击事件监听,每个桌面图标都是一个自定义的BubbleTextView icon.setOnLongClickListener(mIconLongClickListener); icon.setLongPressTimeout(ViewConfiguration.get(parent.getContext()) .getLongPressTimeout()); icon.setOnFocusChangeListener(mIconFocusListener); // Ensure the all apps icon height matches the workspace icons DeviceProfile profile = mLauncher.getDeviceProfile(); Point cellSize = profile.getCellSize(); GridLayoutManager.LayoutParams lp = (GridLayoutManager.LayoutParams) icon.getLayoutParams(); lp.height = cellSize.y; icon.setLayoutParams(lp); return new ViewHolder(icon); } case VIEW_TYPE_EMPTY_SEARCH: return new ViewHolder(mLayoutInflater.inflate(R.layout.all_apps_empty_search, parent, false)); case VIEW_TYPE_SEARCH_MARKET: View searchMarketView = mLayoutInflater.inflate(R.layout.all_apps_search_market, parent, false); searchMarketView.setOnClickListener(new View.OnClickListener() { @Override public void onClick(View v) { mLauncher.startActivitySafely(v, mMarketSearchIntent, null); } }); return new ViewHolder(searchMarketView); case VIEW_TYPE_SEARCH_DIVIDER: return new ViewHolder(mLayoutInflater.inflate( R.layout.all_apps_search_divider, parent, false)); case VIEW_TYPE_PREDICTION_DIVIDER: /* falls through */ case VIEW_TYPE_SEARCH_MARKET_DIVIDER: return new ViewHolder(mLayoutInflater.inflate( R.layout.all_apps_divider, parent, false)); default: throw new RuntimeException("Unexpected view type"); } @Override public void onBindViewHolder(ViewHolder holder, int position) { switch (holder.getItemViewType()) { case VIEW_TYPE_ICON: { AppInfo info = mApps.getAdapterItems().get(position).appInfo; BubbleTextView icon = (BubbleTextView) holder.mContent; icon.applyFromApplicationInfo(info); icon.setAccessibilityDelegate(mLauncher.getAccessibilityDelegate()); break; } case VIEW_TYPE_PREDICTION_ICON: { AppInfo info = mApps.getAdapterItems().get(position).appInfo; BubbleTextView icon = (BubbleTextView) holder.mContent; icon.applyFromApplicationInfo(info); icon.setAccessibilityDelegate(mLauncher.getAccessibilityDelegate()); break; } case VIEW_TYPE_EMPTY_SEARCH: TextView emptyViewText = (TextView) holder.mContent; emptyViewText.setText(mEmptySearchMessage); emptyViewText.setGravity(mApps.hasNoFilteredResults() ? Gravity.CENTER : Gravity.START | Gravity.CENTER_VERTICAL); break; case VIEW_TYPE_SEARCH_MARKET: TextView searchView = (TextView) holder.mContent; if (mMarketSearchIntent != null) { searchView.setVisibility(View.VISIBLE); } else { searchView.setVisibility(View.GONE); } break; } if (mBindViewCallback != null) { mBindViewCallback.onBindView(holder); } } 下面再来看看AllAppsGridAdapter构造方法,里面传入了View.OnClickListener和View.OnLongClickListenerpublic AllAppsGridAdapter(Launcher launcher, AlphabeticalAppsList apps, View.OnClickListener
iconClickListener, View.OnLongClickListener iconLongClickListener) { ... } AllAppsGridAdapter是在AllAppsContainerView的构造方法中初始化的,如下:public AllAppsContainerView(Context context, AttributeSet attrs, int defStyleAttr) {
super(context, attrs, defStyleAttr); Resources res = context.getResources(); mLauncher = Launcher.getLauncher(context); mSectionNamesMargin = res.getDimensionPixelSize(R.dimen.all_apps_grid_view_start_margin); mApps = new AlphabeticalAppsList(context); mAdapter = new AllAppsGridAdapter(mLauncher, mApps, mLauncher, this); mApps.setAdapter(mAdapter); mLayoutManager = mAdapter.getLayoutManager(); mItemDecoration = mAdapter.getItemDecoration(); DeviceProfile grid = mLauncher.getDeviceProfile(); if (FeatureFlags.LAUNCHER3_ALL_APPS_PULL_UP && !grid.isVerticalBarLayout()) { mRecyclerViewBottomPadding = 0; setPadding(0, 0, 0, 0); } else { mRecyclerViewBottomPadding = res.getDimensionPixelSize(R.dimen.all_apps_list_bottom_padding); } mSearchQueryBuilder = new SpannableStringBuilder(); Selection.setSelection(mSearchQueryBuilder, 0); } 可以看到AllAppsGridAdapter的View.OnClickListener来自mLauncher即Launcher.java,View.OnLongClickListener传入的是this,即在本类的onLongClick中处理,这样即所有item的click事件都在Launcher的onClick处理//packages/apps/Launcher3/src/com/android/launcher3/Launcher.java
public void onClick(View v) { // Make sure that rogue clicks don't get through while allapps is launching, or after the // view has detached (it's possible for this to happen if the view is removed mid touch). if (v.getWindowToken() == null) { return; } if (!mWorkspace.isFinishedSwitchingState()) { return; } if (v instanceof Workspace) { if (mWorkspace.isInOverviewMode()) { showWorkspace(true); } return; } if (v instanceof CellLayout) { if (mWorkspace.isInOverviewMode()) { mWorkspace.snapToPageFromOverView(mWorkspace.indexOfChild(v)); showWorkspace(true); } return; } Object tag = v.getTag(); if (tag instanceof ShortcutInfo) { onClickAppShortcut(v); } else if (tag instanceof FolderInfo) { if (v instanceof FolderIcon) { onClickFolderIcon(v); } } else if ((FeatureFlags.LAUNCHER3_ALL_APPS_PULL_UP && v instanceof PageIndicator) || (v == mAllAppsButton && mAllAppsButton != null)) { onClickAllAppsButton(v); } else if (tag instanceof AppInfo) {//如果是apk调用startAppShortcutOrInfoActivity,启动对应Activity startAppShortcutOrInfoActivity(v); } else if (tag instanceof LauncherAppWidgetInfo) { if (v instanceof PendingAppWidgetHostView) { onClickPendingWidget((PendingAppWidgetHostView) v); } } }当点击每个应用的icon后,就会调用startAppShortcutOrInfoActivity(View v)
private void startAppShortcutOrInfoActivity(View v) {
ItemInfo item = (ItemInfo) v.getTag(); Intent intent = item.getIntent(); if (intent == null) { throw new IllegalArgumentException("Input must have a valid intent"); } boolean success = startActivitySafely(v, intent, item); getUserEventDispatcher().logAppLaunch(v, intent); if (success && v instanceof BubbleTextView) { mWaitingForResume = (BubbleTextView) v; mWaitingForResume.setStayPressed(true); } } 在这个方法里接着调用本类的startActivitySafely,最终在这个LauncherAppsCompat.getInstance(this).startActivityForProfilepublic void startActivityForProfile(ComponentName component, UserHandleCompat user,
Rect sourceBounds, Bundle opts) { Intent launchIntent = new Intent(Intent.ACTION_MAIN); launchIntent.addCategory(Intent.CATEGORY_LAUNCHER); launchIntent.setComponent(component); launchIntent.setSourceBounds(sourceBounds); launchIntent.addFlags(Intent.FLAG_ACTIVITY_NEW_TASK); mContext.startActivity(launchIntent, opts); } 这样每点击一个应该icon就会启动一个对应的Activity,本开始只是想看看点击apk启动应用的流程,找到apk icon点击事件找了半天,在这顺带记录下,当然还有很多从数据库获取桌面布局信息,更新布局信息啥的在这没有提到主要是以apk信息的获取和icon单击事件来分析的,当手机里有多个应用了下面两个属性时,就会看到会让用户选择用那个桌面<action android:name="android.intent.action.MAIN" />
<category android:name="android.intent.category.HOME" /> 下面简单总结下桌面的显示流程 1、手机启动后会先启动桌面,在Launcher的数据库中会有每个apk显示位置的详细信息,具体是以坐标的方式。 2、通过getActivityList查询所有需要显示在桌面的apk信息,并返回一个集合。 3、主界面是一个自定义AllAppsRecyclerView继承RecyclerView,设置了AllAppsGridAdapter会根据上面list集合的size创建多少个BubbleTextView(即看到的桌面图标)。